Configuration
Syncing network folders
If you wish to synchronize a folder that is outside your local computer you will first need to configure the Smartsign Sync Service with an account that has access to that resource. By default the service uses the account “Local System” which only has access to folders on the local computer.
-
Launch the application “Services.msc” on your computer
-
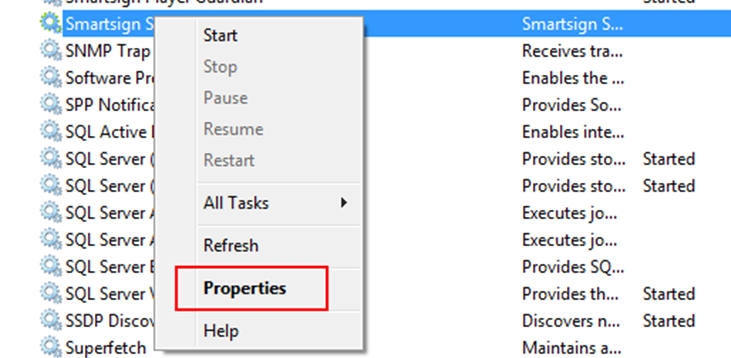
Find the service “Smartsign Sync 10” and right click it. Choose Properties.
-
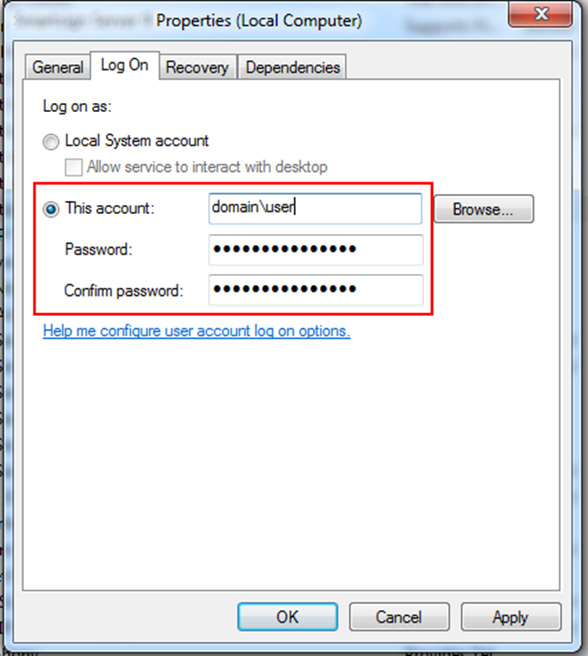
Go to the tab “Log On” and select “This account:”
-
Input an account which has access to the network location you wish to synchronize
-
Click OK to save
-
Restart the service
Proxy settings
If your network requires the use of a proxy server to access the internet you will need to configure proxy settings. This must be done either logged in to the account that runs the Smartsign Sync 10 Service or by configuring it using the Smartsign Sync Wizard.
If you click Proxy in the Smartsign Sync Wizard the following dialog will appear:
- Check the box (default) and click Save to copy the proxy settings from Internet Explorer (Windows Internet Options) to Smartsign Sync 10. Please observe that if you change the settings in IE, you will need to perform this again in order to update the settings.
- Uncheck the box to enter proxy settings manually, for example: “MyProxy:8080”.